Virtual/Streaming Donation Instructions
Zoom tips
- Verify you have the latest version of Zoom installed, must be Version 5.17.0 or higher.
- Download the Zoom Donations by Pledge app.
- Make sure the Zoom email address is also a user in your Pledge Impact Hub for instant Zoom access to Pledge fundraisers.
- Read our Guide to our ‘Donations by Pledge’ App on Zoom
All Platform Tips
- Ensure you’ve created an optimal streaming environment with maximum computing power.
- Close extra browsers and programs that might slow down your computer speed.
- We recommend being hardwired to the Internet to minimize any streaming delays.
- You should use the latest version of macOS. We also recommend using a MacBook Pro over a MacBook Air, if possible.
Download and install PledgeCam or OBS Studio and OBS Virtual Camera
Configure PledgeCam
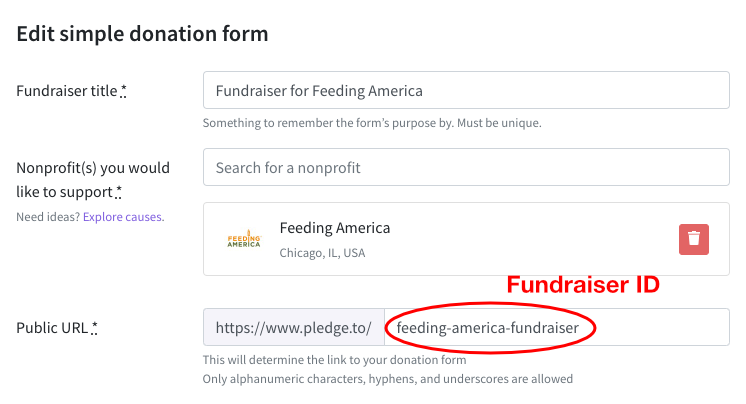
Find your Fundraiser ID by copying the information after the / in the url.
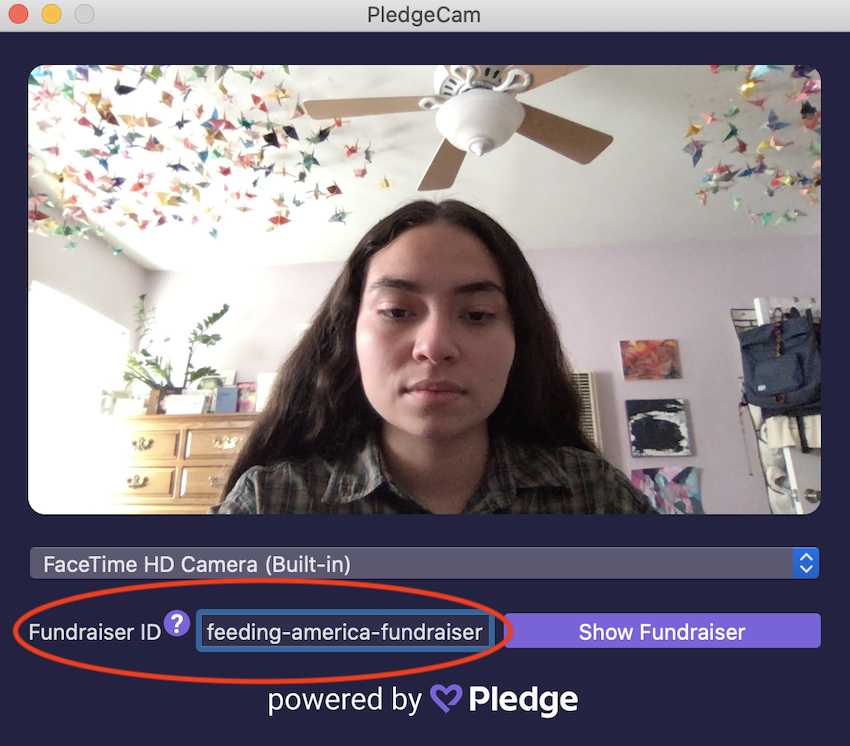
Launch PledgeCam.
Enter your Fundraiser ID into the PledgeCam application.
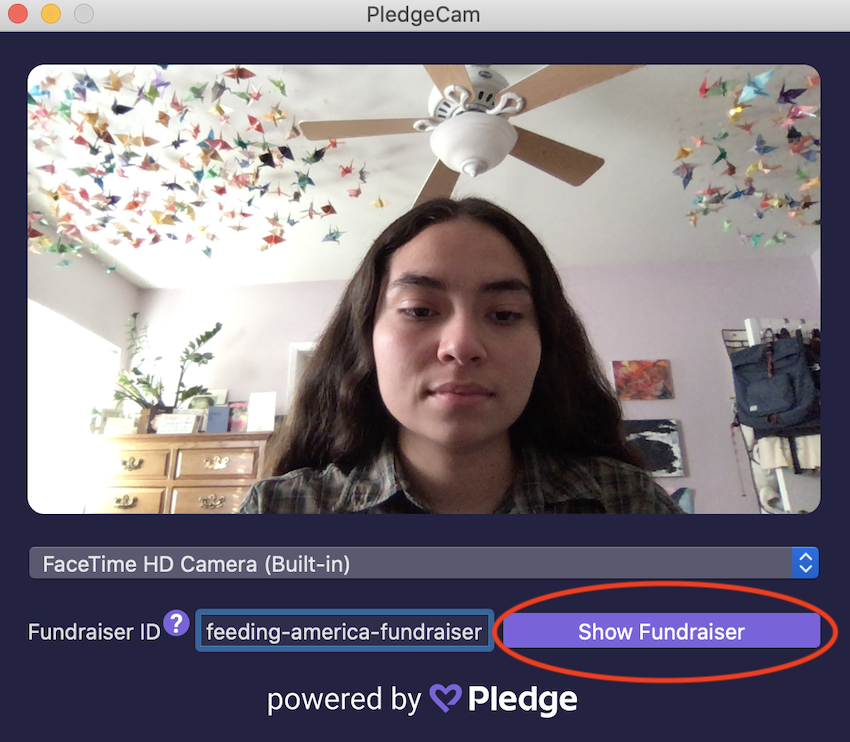
Click Show Fundraiser.
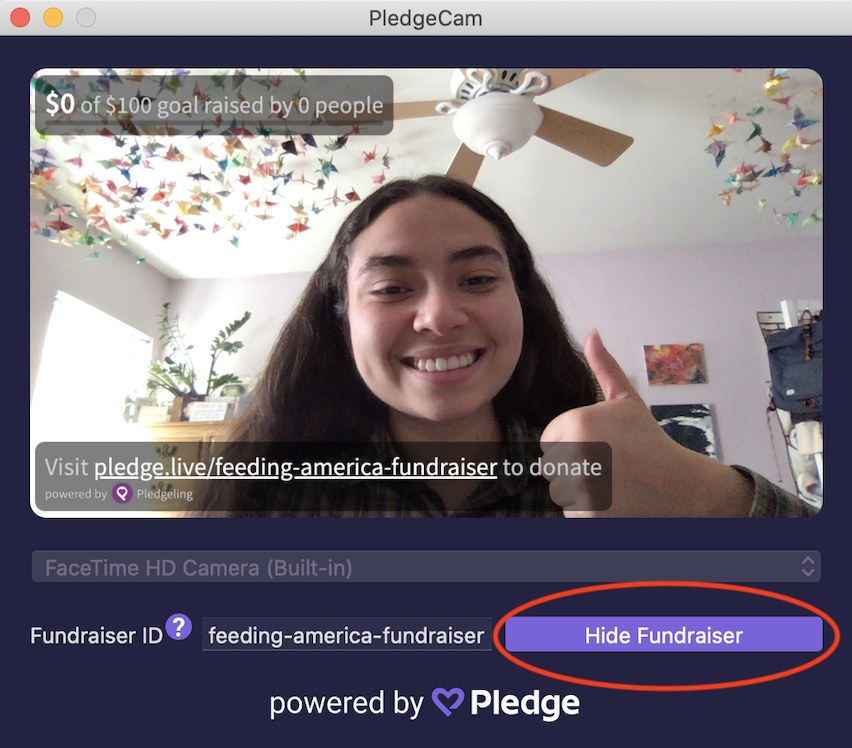
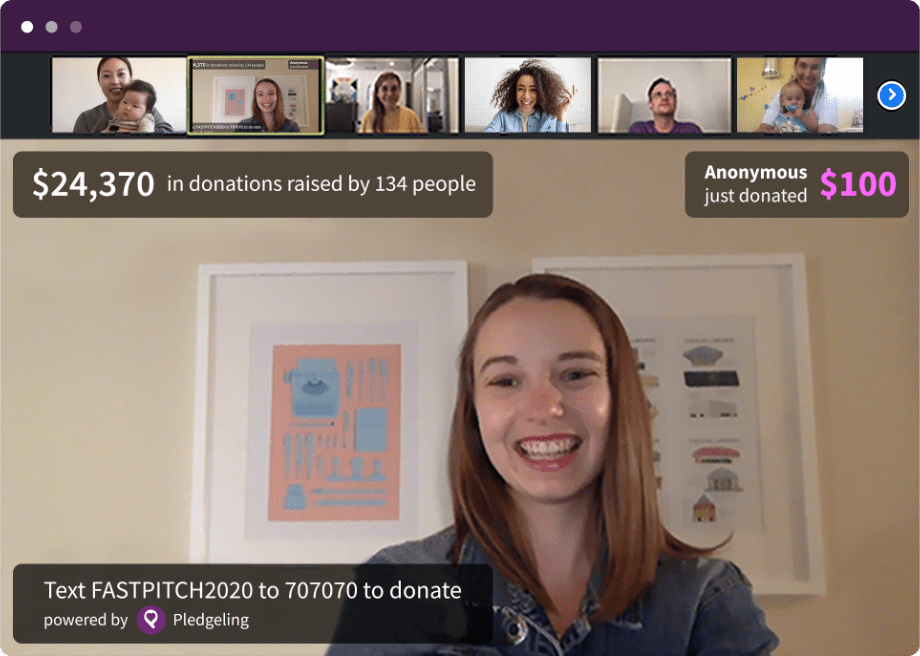
Your PledgeCam overlay is now live!
If you’d like to hide the fundraiser, click Hide Fundraiser.
Select PledgeCam as camera source
Now all that is needed is to go to your respective streaming platform and select PledgeCam as your new camera source and you're ready to go!
Happy fundraising!
Set up your video source in OBS Studio
Launch OBS Studio.
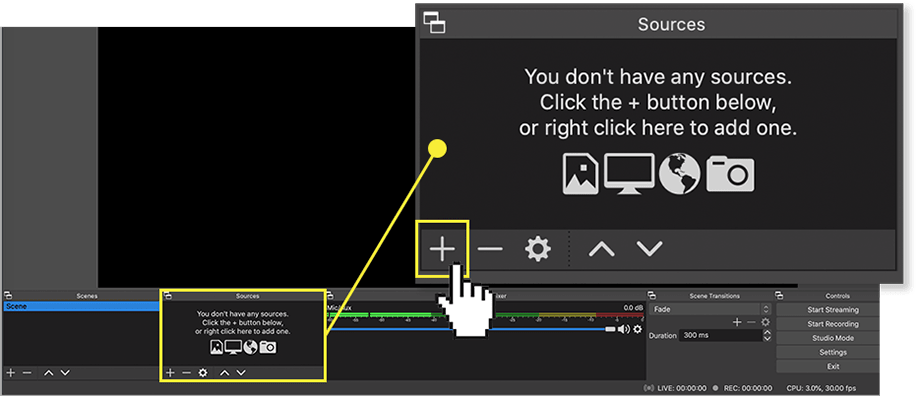
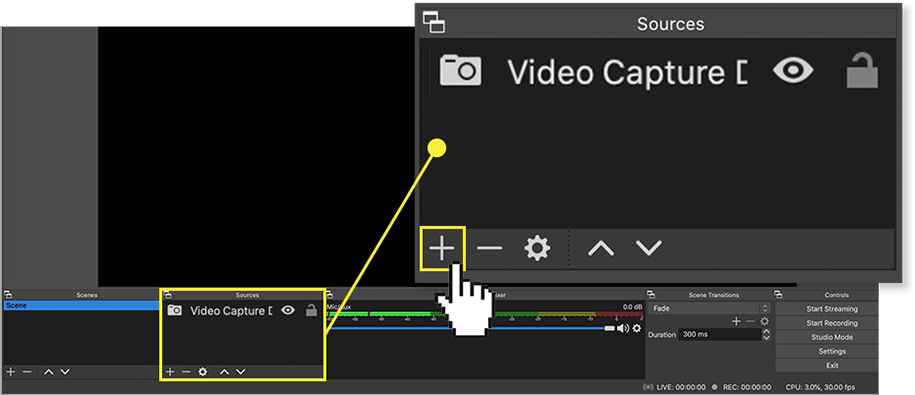
Under the “Sources” section, click the “+” button.
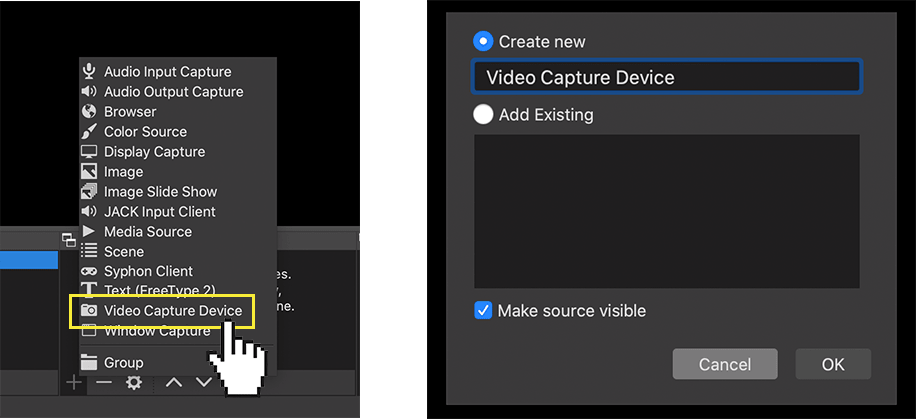
Select “Video Capture Device”.
The “Create New” radio button should be selected, with the title “Video Capture Device”.
Click “OK”.
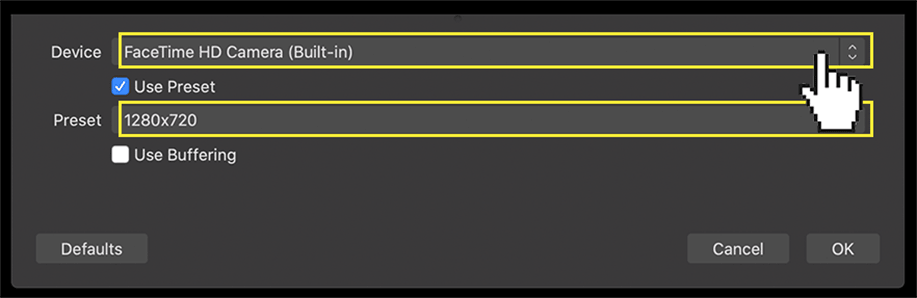
Select your preferred camera source from the dropdown.
Take note of the preset size (1280x720) for when you add Zoom Donations to OBS Studio.
Click “OK”.
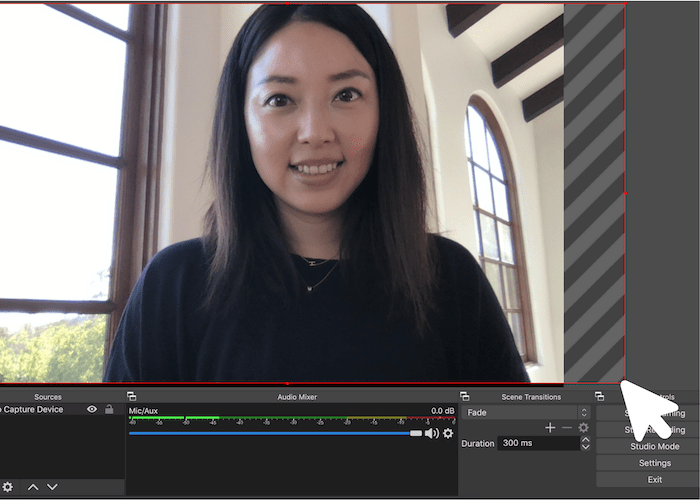
Optional: Resize your camera output to fill up the entire screen. Depending on your computer display settings, there may be a black border otherwise.
Drag the bounding box inward to eliminate any gray bars from appearing on the side.
Add Donations to OBS Studio
Under the “Sources” section, click the “+” button.
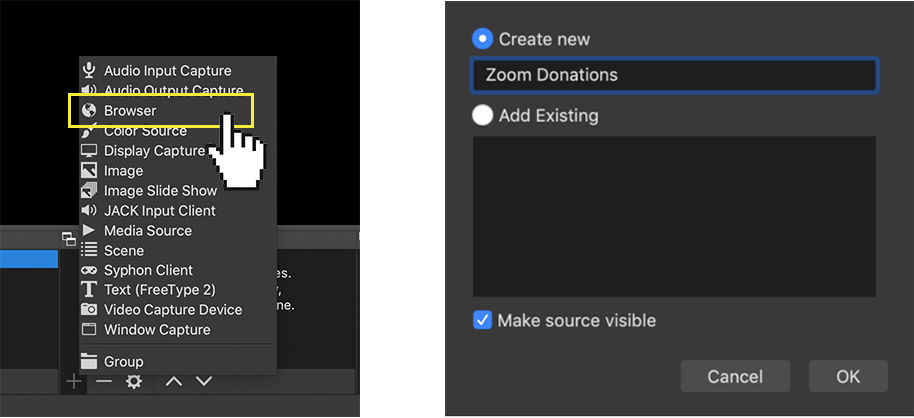
Select “Browser”.
The “Create New” radio button should be selected. Type in your preferred label (e.g.: Zoom Donations).
Click “OK”.
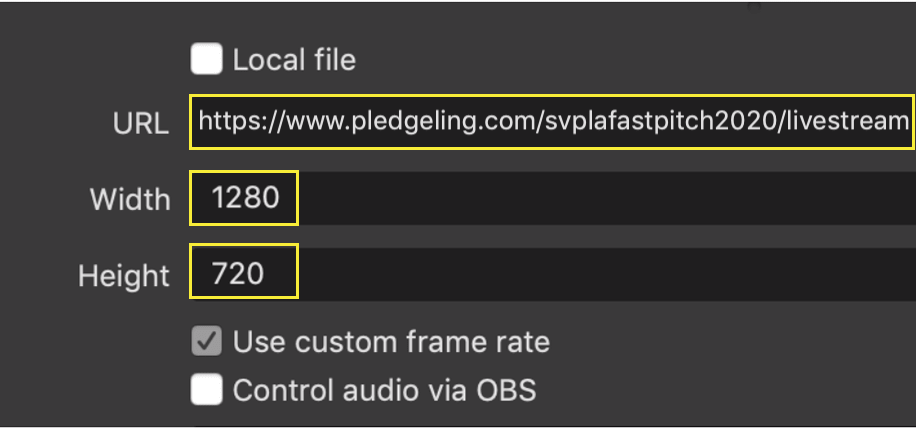
In the URL field, enter the overlay URL included in your email.
Set the width and height to match the preset dimensions (e.g.: width 1280 and height 720).
Click “OK”.
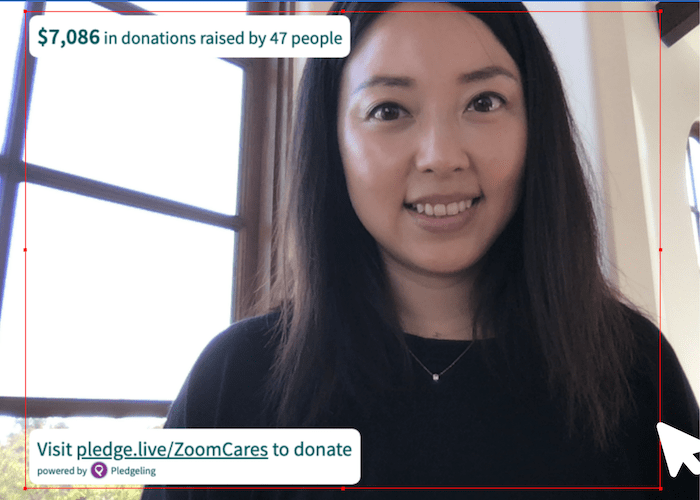
Resize and adjust the bounding box to fit into the camera view by dragging the corners of the box.
You may need to center-align it vertically to ensure the donation boxes aren’t cut off in camera view.
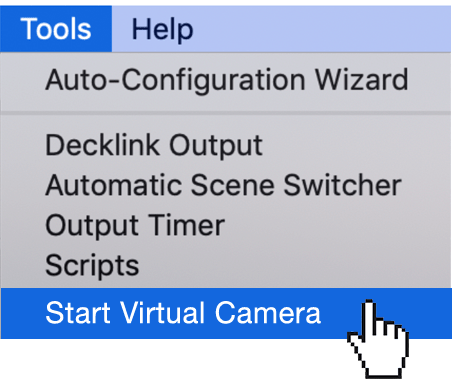
Once you are ready to display your fundraiser in your Zoom meeting, go to “Tools” at the top navigation bar and select “Start Virtual Camera”.
Select OBS as camera source
Now all that is needed is to go to your respective streaming platform and select OBS Virtual Camera as your new camera source and you're ready to go!
Happy fundraising!
Set up your video source in OBS Studio
Launch OBS Studio.
Under the “Sources” section, click the “+” button.
Select “Video Capture Device”.
The “Create New” radio button should be selected, with the title “Video Capture Device”.
Click “OK”.
Select your preferred camera source from the Device dropdown.
Click “OK”.

Optional: Resize your camera output to fill up the entire screen. Depending on your computer display settings, there may be a black border otherwise.
Drag the bounding box inward to eliminate any gray bars from appearing on the side.
Add Donations to OBS Studio
Under the “Sources” section, click the “+” button.
Select “Browser”.
The “Create New” radio button should be selected. Type in your preferred label (e.g.: Zoom Donations).
Click “OK”.
In the URL field, enter the overlay URL included in your email.
Set the width and height to match the preset dimensions (e.g.: width 1280 and height 720).
Click “OK”.
Resize and adjust the bounding box to fit into the camera view by dragging the corners of the box.
You may need to center-align it vertically to ensure the donation boxes aren’t cut off in camera view.
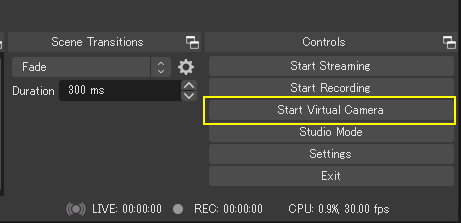
Once you are ready to display your fundraiser in your Zoom meeting, select "Start Virtual Camera" in the bottom right menu.
Select OBS as camera source
Now all that is needed is to go to your respective streaming platform and select OBS Virtual Camera as your new camera source and you're ready to go!
Happy fundraising!